Now having the greater part of the rig functionality sorted, I moved on to the final stages of rigging. Now using the UV'd model for the Rocketgirl, I begin organizing the blandshapes that may be used in the future for facial expressions. The director communicated that she should be able to smile/frown with prodominantly curious/nervous and hesitant features. I set up my facial control in such a way as to create animator friendly handles.
The UV'd model
Setting up the Blendshapes
The final look of the rig
Testing the Final Rig!
Here are some final tests that I made to ensure that all of the controls I had created so far were functioning correctly. I usually test my Rig by placing the character into extreme poses. Please see the following links which are the final aspects of rigging the rocket girl. We have also decided that the animators will be referencing the rig. If they should have any requests/feedback on errors, I will be able to work it to their needs.
Using methods that did not differ much from rigging the legs, I created similar controls for the arms. Here are a number of tests which I carried out to evaluate the progress of my work.
Rigging the Hair
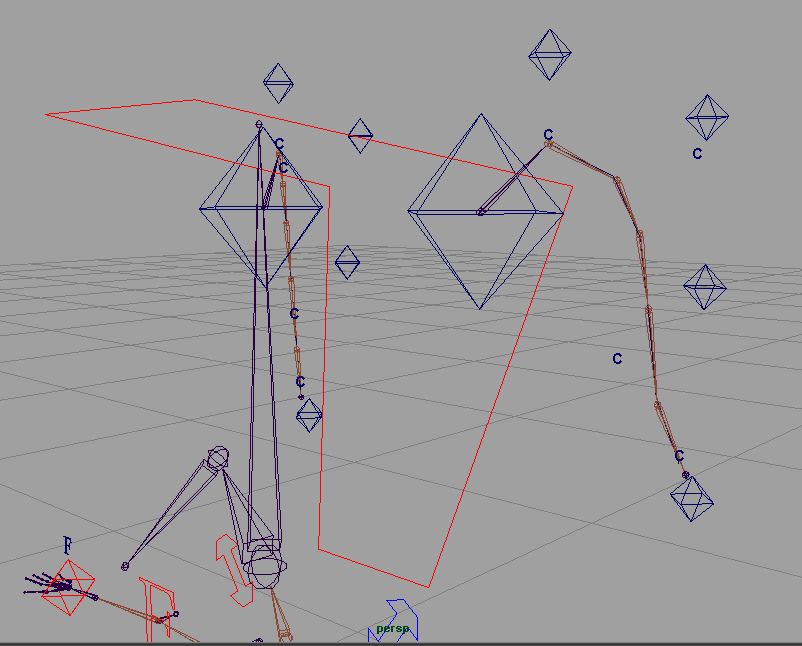
Knowing that the character was a young girl with a playful bubbliness about herself, I knew that the hair controls would be an essential part of the rig to give an added organic feel to the rig. I used IK spline solvers with parented clusters to achieve this. I tried to have a clear and pleasing design that would remain animator friendly whilst enabling a wide variety of hair movements.
Here are some snap shots to indicate a better view of the hair set up as it was developed.
Rigging the Skirt
One of the most challenging aspects that I faced whilst rigging was the daunting task of making a "skirt rig". To even try to imitate something so flexible and organic was going to be very different from what I had attempted before. I was also told that animators would ideally like to be able to have a good level of control over the way the skirt behaved and therefore could not simply just be bound to the legs.
I decided to take two of the major aspects into consideration:
1. Do the animators want the skirt to move completely automatically (i.e via a skin bind to the legs), but then have little or no control over the motion of the skirt. or
2. Do the animators want total control over the skirt, but then have to completely animate cloth?!
I felt that it would be best to encorporate both of these aspects through the use of influence objects. Partly the skirt would be influences by the legs, however the rings that surround the skirt also have partial influence over the skirt to tweak any look that they may go for.
I also decided to add a very nice extra feature that the animators could use if they wanted. I created a wave deformer that is set up in just the right way so that if they wanted, they may be able to achieve waves on the skirt similar to cloth that may blow in the wind. Although many of the aspects of rigging had been built from tutorials, I feel this is one element that I developed to my projects needs through trial and error. I was very pleased with the evental outcome and did further tests to confirm my results.
Here are more screenshots that show the progress of the rig as I added more functionality to it. Here I started adding more controls to deform the lower body separately from the upper body. This could give the animator added capabilities.
Here is another unique feature that I added. Here we can see that not only the back stretches and squshes- the mesh around the waist also fattens and thins out. This is a consideration that is very important in animation- the conservation of volume is key in enabling realistic deformations of a character.
Although this may seem to look very messy, the effect was created with default smooth bind. Once the painted weights is done for all regions, and the arms are constrained to follow the upper body, we will find a great deal of improvement.
A look at the rig on its own
Rig Tests/Extreme Poses
Here is a rig test to demonstrate the first successful use of the stretchy limb controls.
With an initial model ready to work from I started the skeletal set up. I used a new approach whilst constructing the rig. Sometimes we gain gain further control from individual joint chains when they are not connected. For example, the leg is disjoint from the hip. The arms are not joined to the shoulder. the hands are not joined to the wrists and even the feet are not joined to the leg. Using this set up we will be able to set up stretchy limb functionality later on.
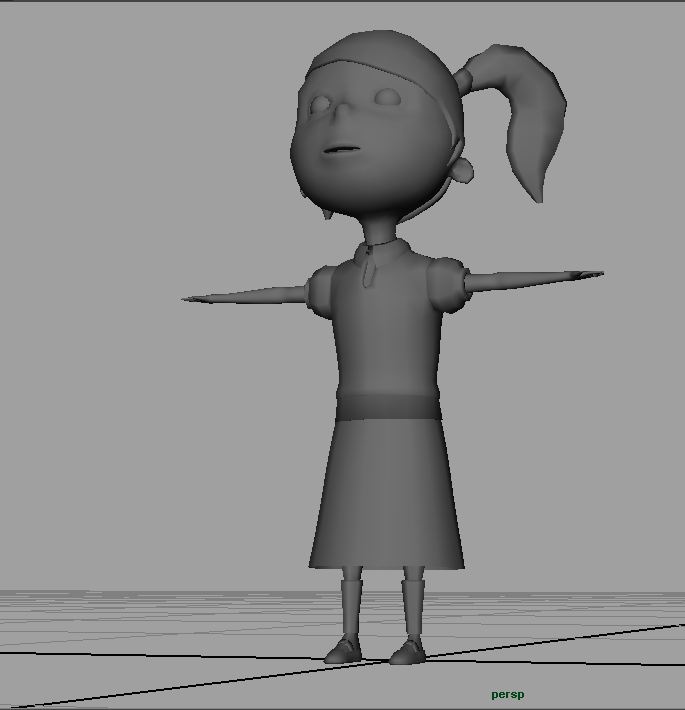
Original Model
Establishing the joints
Setting up IKs
Setting up the stretchy limbs
Following a digital tutors tutorial, I managed to create the stretchy limb functionality using constrained distance locators and a set of expressions that appropriately scaled the leg joints. There are nodes such as the multiplyDivide node which can assist in the desired effects.
I was approached by our animators before beginning the actual rig. This was a very good opportunity for me to analyse the requirements that they wanted for the animation.
Here is the first draft of the 2D animatic. This also gave me a very good idea of the capablities the rig would need.
http://vimeo.com/20952717
(password: rocketman)
We can see many cases where the rig may need to have flexible limbs etc. The animators wanted stretchy limb functionality. I decided that given the style of the character it would need a great deal of control. The feel of the character seems very cartoony.
I also noticed that the rig would need control for the skirt- a feature I had never previously worked on. With this in mind I found some examples of rigs with similar functionality.
I noticed a similar functionality on the moom rig.
Here is an animation that I did last year using the moom rig which demonstrates some of the functionality I am looking for as a rigger in this term.
Here is another example of a very nice animation (not done by myself) that demonstrates the animation capabilities achievable with a good rig and a talented animator.
Another rig that demonstrates a great level of flexibility to the animator is the blake rig. Here is an overview of that rig.
With all of these examples in mind I will now attempt to set a similar standard in my character rig.
From the last project (the spitfire project) I had mentioned the use of referencing.
This was the method by which we would be able to work on different aspects of 3D pipeline like modelling, rigging and animation whilst being able to update each individual part as we go along. In this way we could focus on each part separately throughout the whole project. This method was also intended for this project too and given that I would be woring with Ollie Kane for modelling and Joseph Henson/Nick Georgeou for animation, there would be no tyeething problems in implementing this workflow.